
If you’re starting your New Home, it would be quite a daunting task to imagine the steps of construction from start to finish. All Construction projects differ in size, budget, decisions, scope, delivery and outcomes. Regardless of any type of construction, the project process remains the same.
Any construction journey is a long, steady and stressful journey. But, with explicit and logical project management guidelines, one can make an informed decision starting from planning, execution and completion of the project. Practical knowledge of all the processes involved in construction helps in ideating your visions into tangible form.
Before taking up any construction activity for your new home creation, you must define your:
1) Motive of Construction
2) Practical utility of the project
3) Financial Capacity
4) Manpower requirement
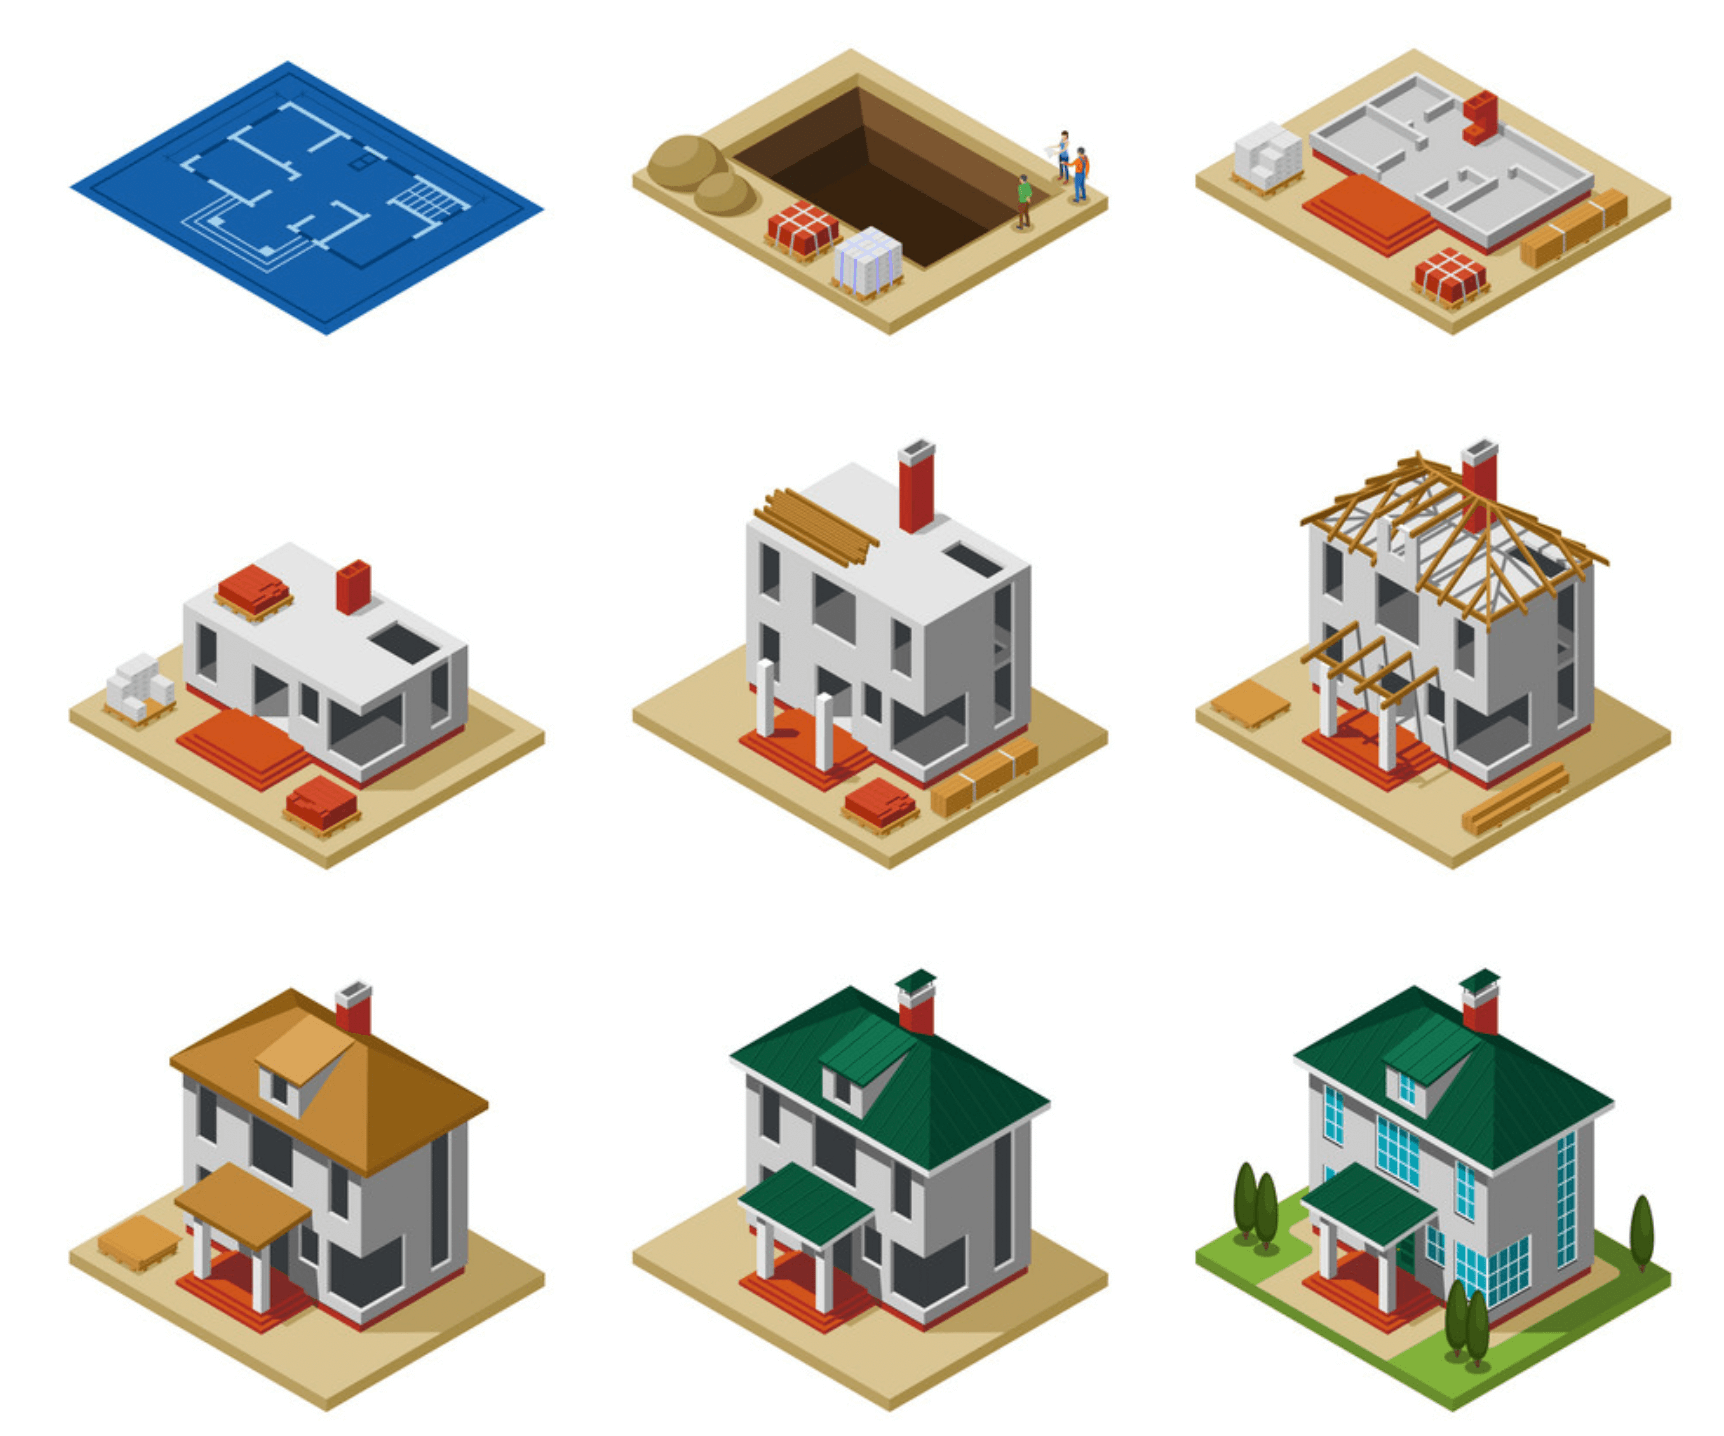
There are 5 construction stages involved for constructing any commercial or residential building:
1) Initiation Phase
2) Pre-Construction Phase
3) Procurement Phase
4) Construction Phase
5) Closeout Phase (Also known as ‘Post Construction Phase’)
1)Initiation Phase
This is the initial stage of the Planning process which helps in articulating clearly the goals of your project. This step mainly helps in assessing the feasibility of the project. Here, the Landowner, Architects and Project managers carry out initial discussions for laying out the roadmap for the project. But care should be taken that the plan must adhere to the guidelines laid out by the respective jurisdictional authorities.
Here, it includes 3 steps that help in getting a clear picture of the planning stage.
(a) Project Feasibility
With the help of a business or a feasibility case study, the project management team defines the aims and goals of the project. Decisions would include finalizing the dimensions for the overall plot, the number of rooms required and other space allocations for the building. After the finalization of the preliminary details, a PID (Project Initiation Document) is generated.
(b) Conceptual Design
The Architect and his/her team help in ideating the conceptual design on the paper. Even the engineers are involved in ensuring the safety aspect of the structure. The Architects come up with a sketch showcasing the space with favorable textures, colors and materials. The Schematic Designs obtained during the design development helps in researching the material availability required for the construction.
(c) Contracting Agreements
The contracting documents contain the final drawings and specifications. These documents help the prospective bidders for executing the construction activities on the field.
2) Pre-Construction Phase
After the bidding stage is complete, the contractor starts with the initiation of the project. The project management team begins preparing the task schedule required for site execution. The schedule is incorporated with the help of the following team members:
Contract Administrator
Project Manager
Superintendent
Field Engineer
Health and Safety Manager
At this stage, all preliminary examinations such as soil testing and other environmental aspects are evaluated. Post-site examination, the respective site authorities will review the plans and findings related to the site.
After the creation of the strategic plan, the budget, the design blueprint and timeline frames are finalized. The project team begins with the procurement of labor and materials required for the construction.
3) Procurement Phase
Procurement is the process of purchasing all the materials required for construction. This includes finding the right labor, building materials and types of equipment needed at the stage of site execution. The general contractor allots the minor contracts to subcontractors during this phase. This stage is crucial for saving on your finances.
4)Construction Phase
(i) Site Cleaning &Levelling:
The construction site is completely cleaned from any kind of tree debris, wastes, etc. The ground is area is leveled before the work commences.
Duration: 1 day
(ii) Soil Testing:
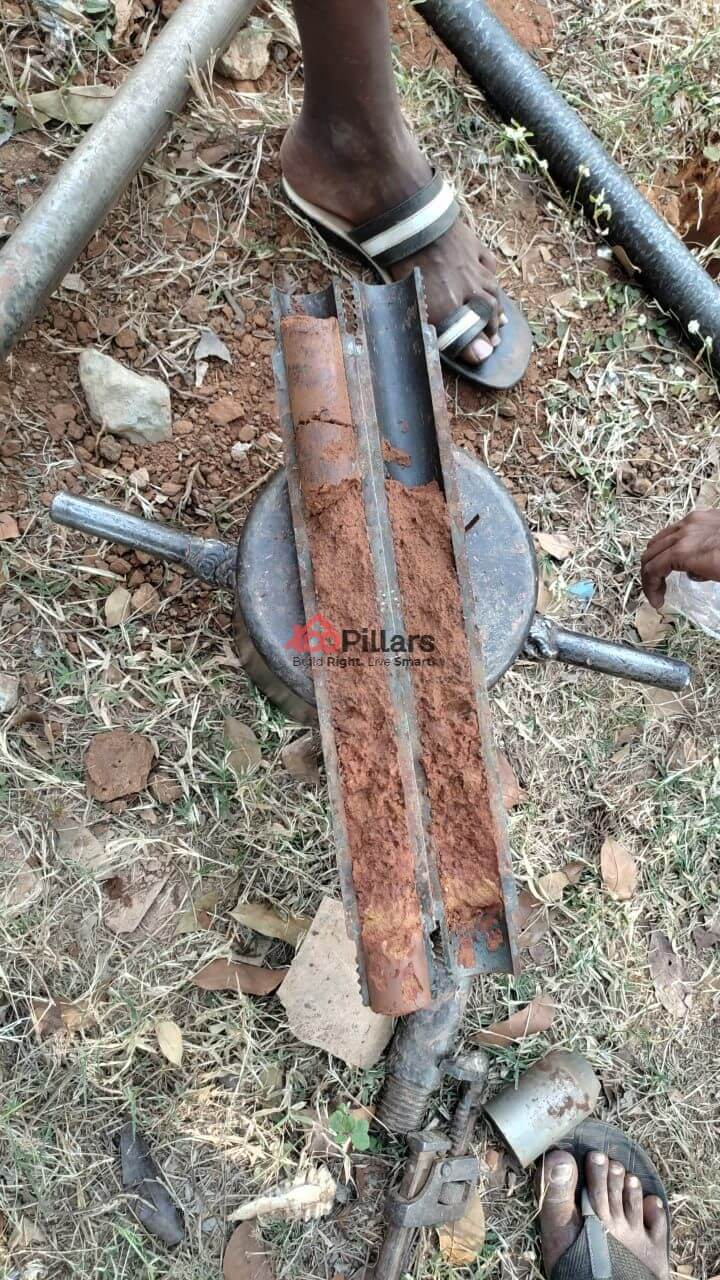
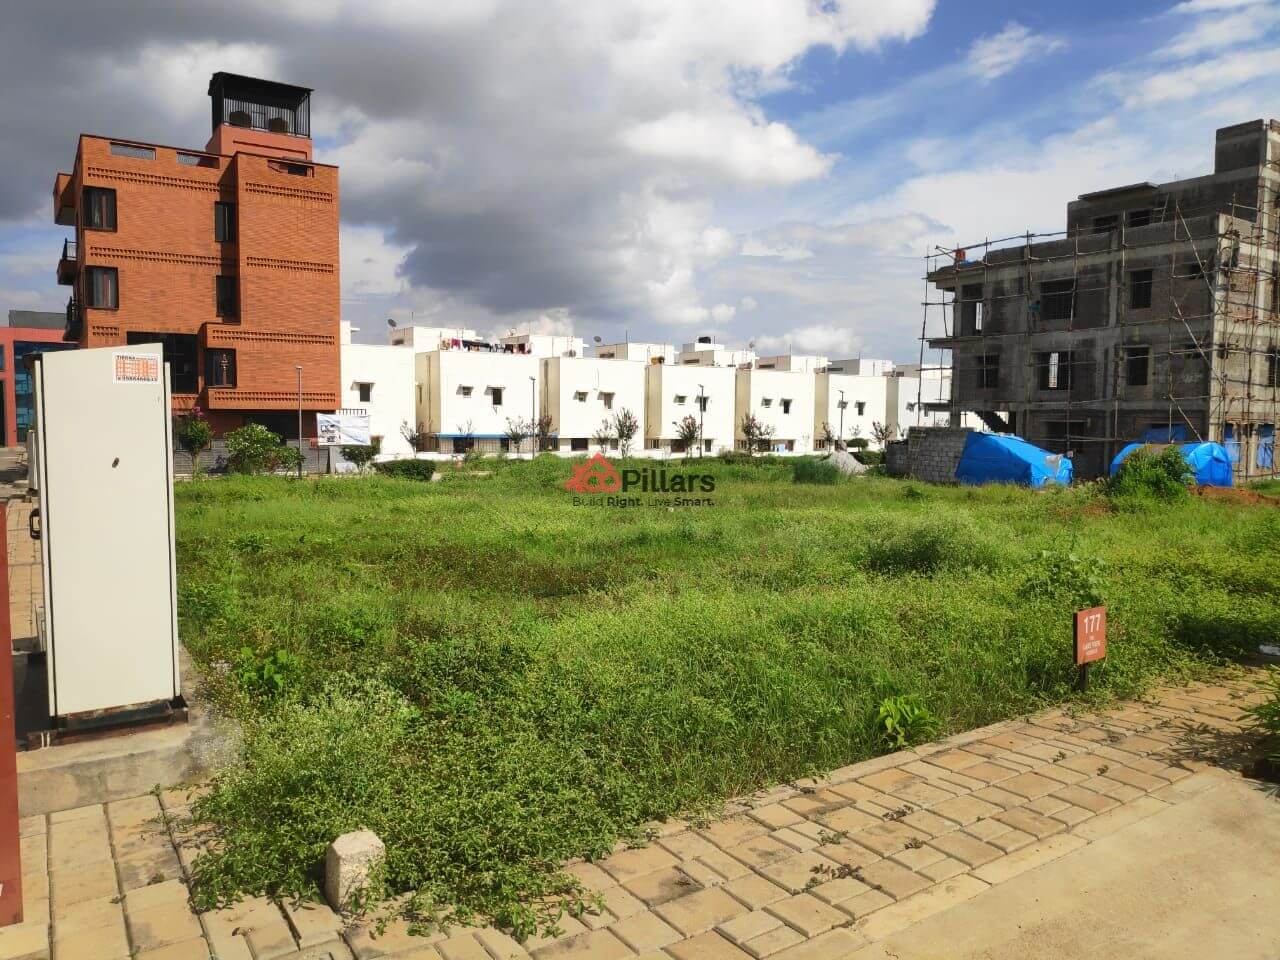
Original Image was captured at 100Pillars Project
The soil sample is collected from different corners of the land using different soil testing methods (CBR, Proctor Field, etc) as per the soil conditions. Soil testing includes soil collection, soil analysis at the lab to determine different nutrients (Such as Nitrogen, Phosphorous, Potassium, Calcium, Magnesium, Zinc, etc )in the soil using various chemical and physical methods
Duration- 1 day
(iii) Footing Marking:
Here the footing size pattern (following the width dimensions) is drawn as per the plan using marking powder.
Duration: 1 day
(iv) Excavation:
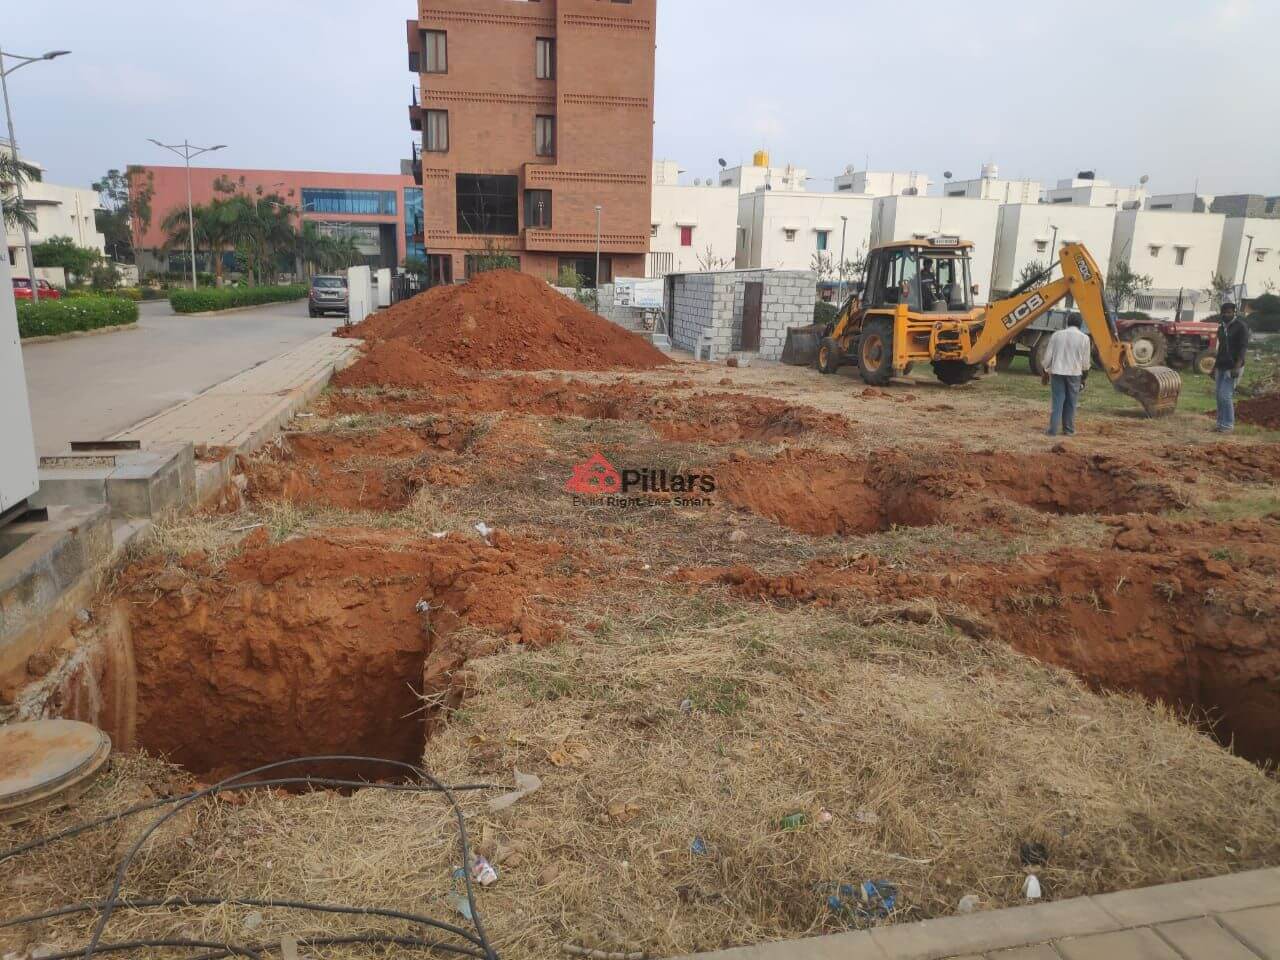
Excavation for the foundation is carried out using excavating equipment according to the footing markings.
Duration: 2 days
(v) PCC Bed for Footing:
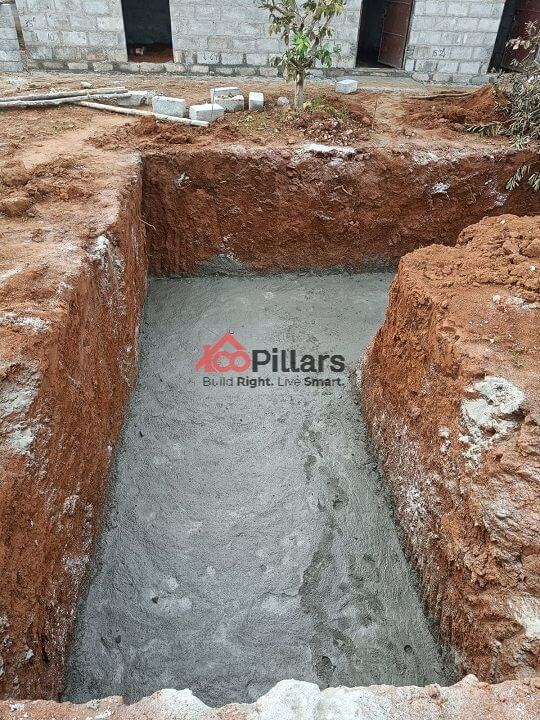
For the foundation trench, a covering of PCC (Plain Cement Concrete) is filled in the excavated portion. This is done before the foundation reinforcements are laid.
Duration: 2 days
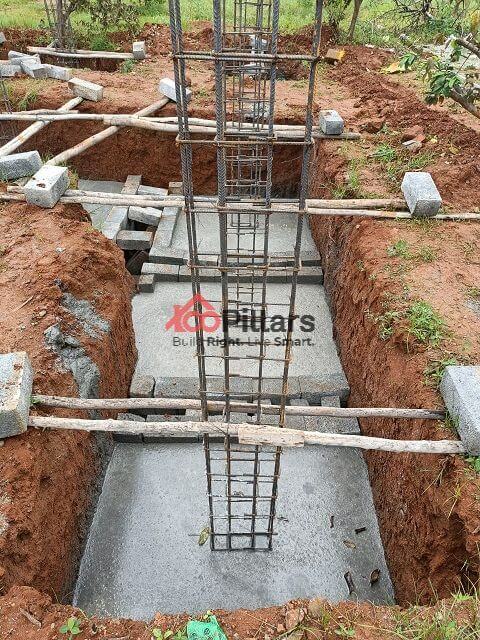
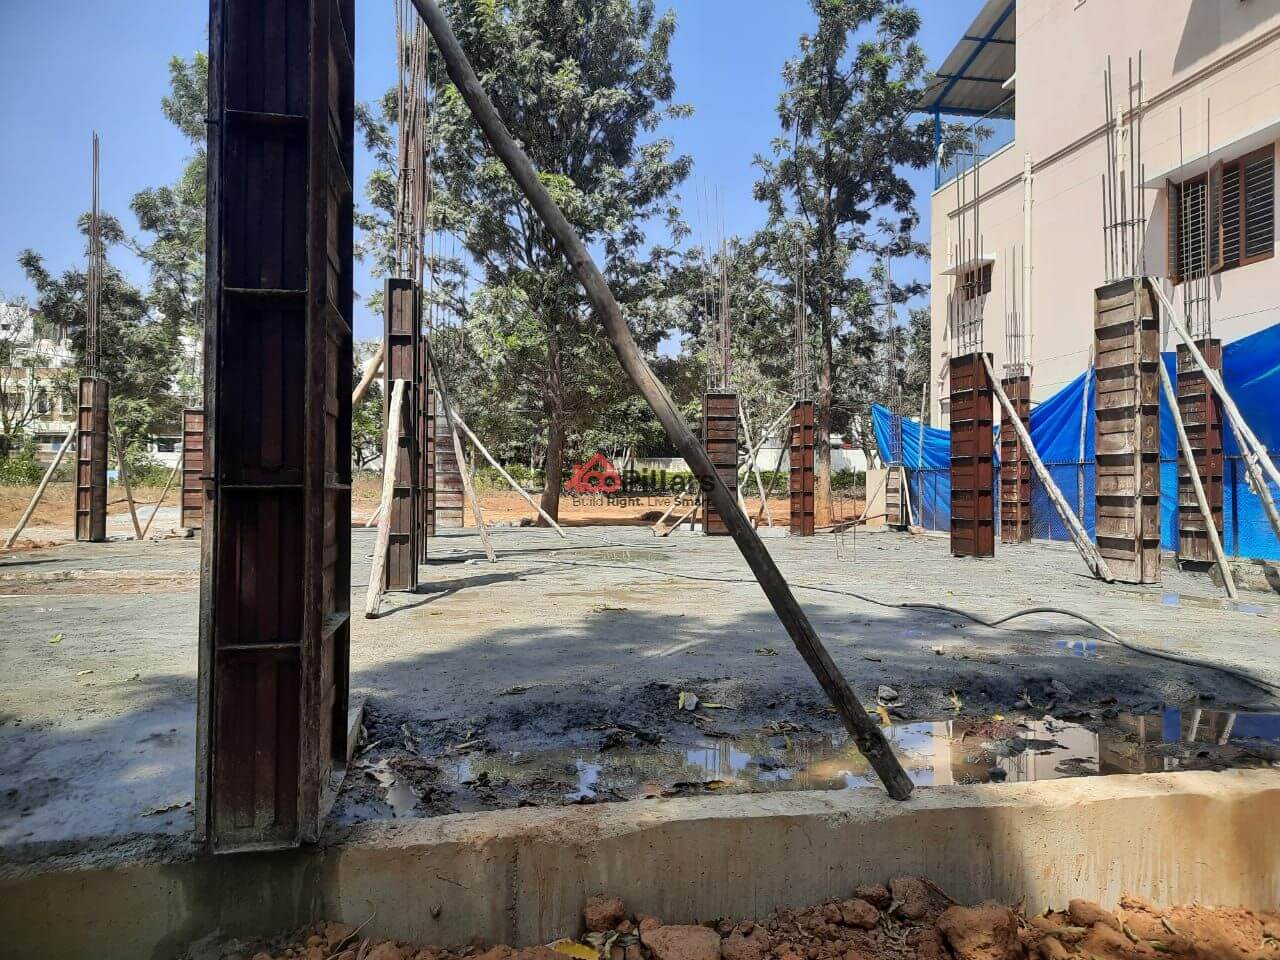
(vi) Reinforced Mat Laying and Column Erection:
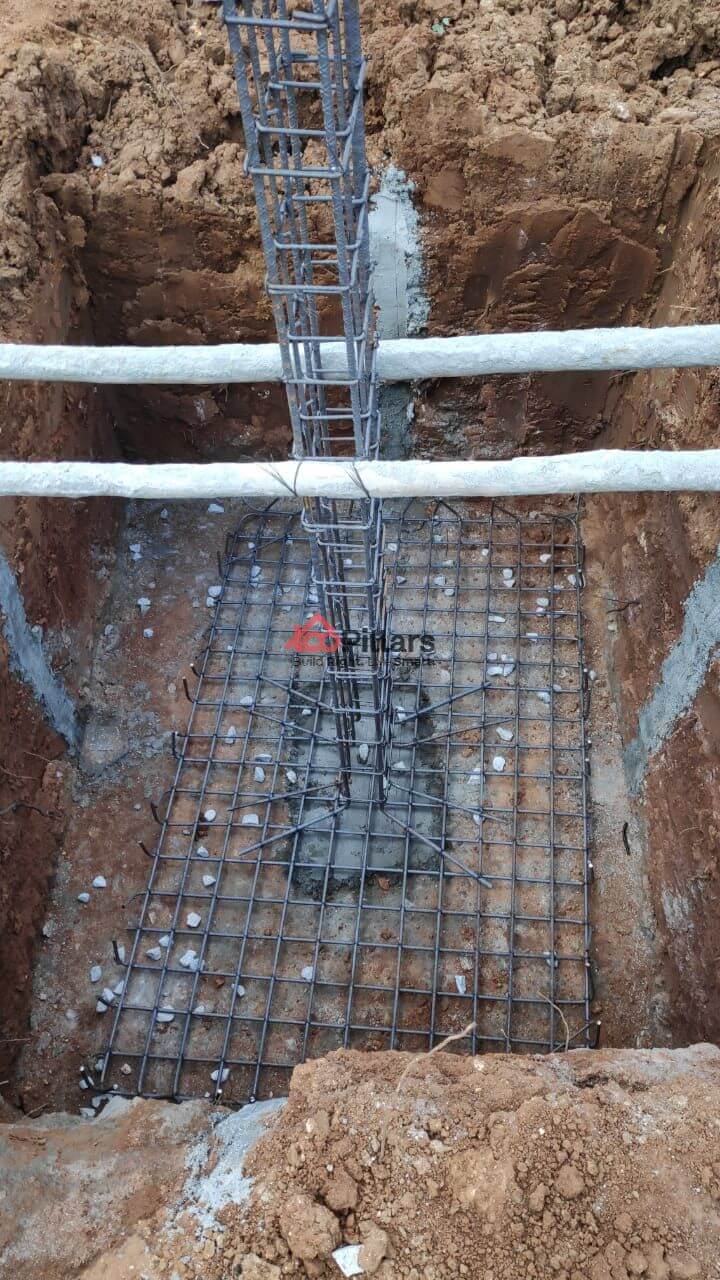
A reinforced mat or raft foundation is a type of shallow foundation which consists of a large rectangular or circular slab that supports the entire superstructural load and distributes the whole area underneath the structure. It also helps in decreasing the differential settlement of the whole structure if there is a presence of weak soil present underneath.
Columns are mainly installed to support loads of the building. They help in transferring the load to an appropriate Soil Bearing Capacity. The columns are erected in a free-standing fashion or within the building structure. The columns can be circular, rectangular or square-shaped. It is always important to assess the placement of the points where the columns are to be erected. This is done to ensure all required supports are in the proper place before any cuttings did.
Total Duration: 4 days
(vii)Footing Concreting:
Footing Concreting is mainly done to provide support to the foundation and prevent any form of settling. It is an attachment point between the foundation and the soil. It is done by pouring concrete into the trench (or excavated material). Care must be taken to evaluate the soil conditions and the proper depth and width considered while placing the concrete material.
Duration: 2 days
(viii) Sump Creation:
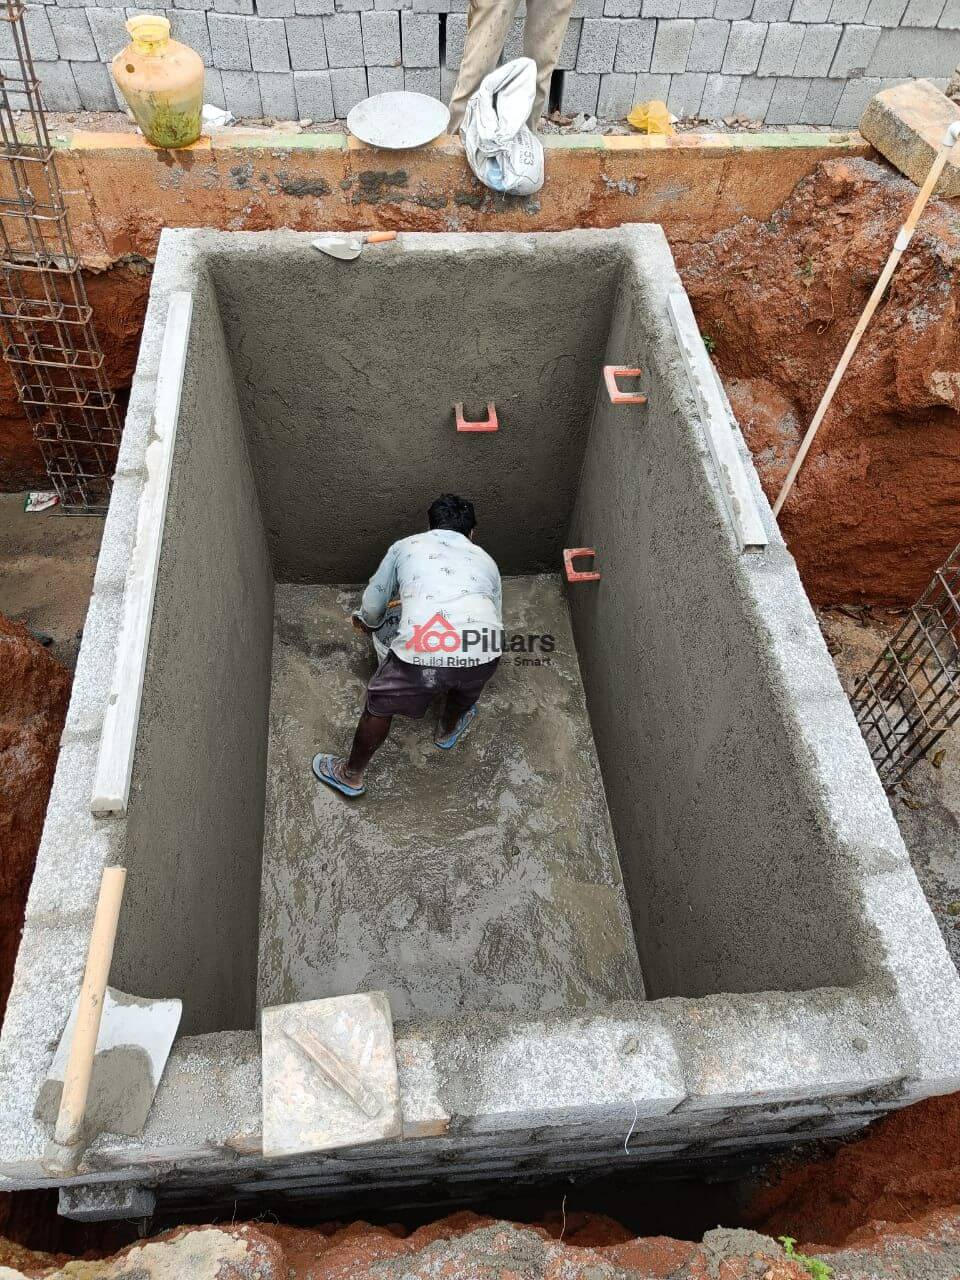
Sumps are important elements required for your homes as they serve as multipurpose water storage for both BWSSB and borewell water. It is the best alternative when one of the water supply systems fails.
Before creating the sump, you must decide its location, depth, size, capacity and type of material used for constructing the sump.
Duration: 5 days
(ix) Column Concreting under plinth:

Column Concreting is done to provide durability and strength to all the structural members present. Concreting for RCC Columns is done in 2 ways:
-Manually
-Machine (RMC Trucks) or Pumps
For Larger construction, RMC(Ready Mix Concrete) trucks are used and machine mix concrete is suited for smaller quantities.
After pouring a sufficient amount of concrete, it is vibrated regularly using mechanical vibrators for uniform distribution at all sides. But over the vibration of concrete must be avoided as this leads to segregation of coarse aggregates which makes the mix weak by settling at the bottom.
Duration: 1 day
(x) Soil Backfilling:
It is the process of restoring or reusing the soil that is removed during the excavation activity. Backfilling is mainly done to increase strength and provide support to the foundation and other structural members.
Choosing the right kind of backfilling material depends on your soil condition. After each layer of backfilling, then the soil is compacted with heavy rammers made of steel or wooden logs. Each layer is filled in the form of the layer with each layer measuring 15cm to 20 cm
Duration: 3 days
(xi) Size Stone Masonry:
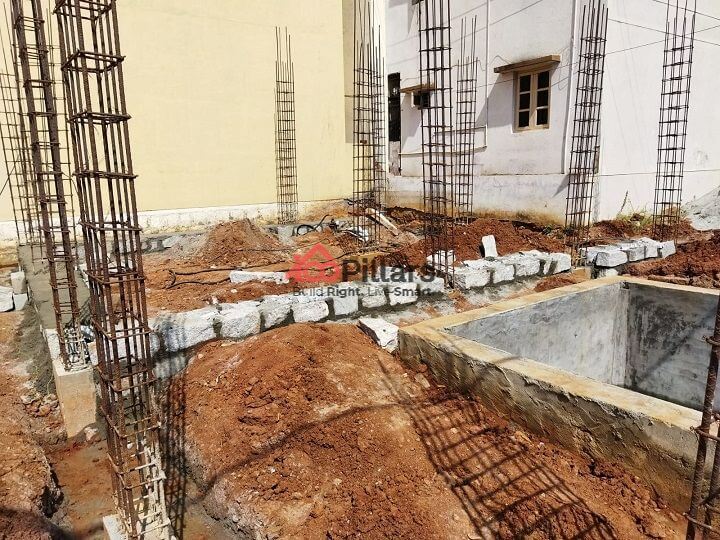
The combination of a composite material formed with stones with mortar units is termed Stone Masonry. Stone Masonry is built differently and is deployed for building the load-bearing structure.
The main objective of having a Size Stone Masonry is to impart support to the structural walls and transfer the load to the soil located underneath.
Before placing the Stone Masonry, a trench of depth measuring 1m to 1.5m is excavated. Then, the soil beneath the trench should be compressed. Post the compaction, now it is ready for Size Stone Masonry. Before placing the stone, the stone should be free from any cracks, cavities, and other possible defects. The stones are soaked or drenched in water before placement to prevent any water absorption that interferes with the mortar.
Duration: 2 days
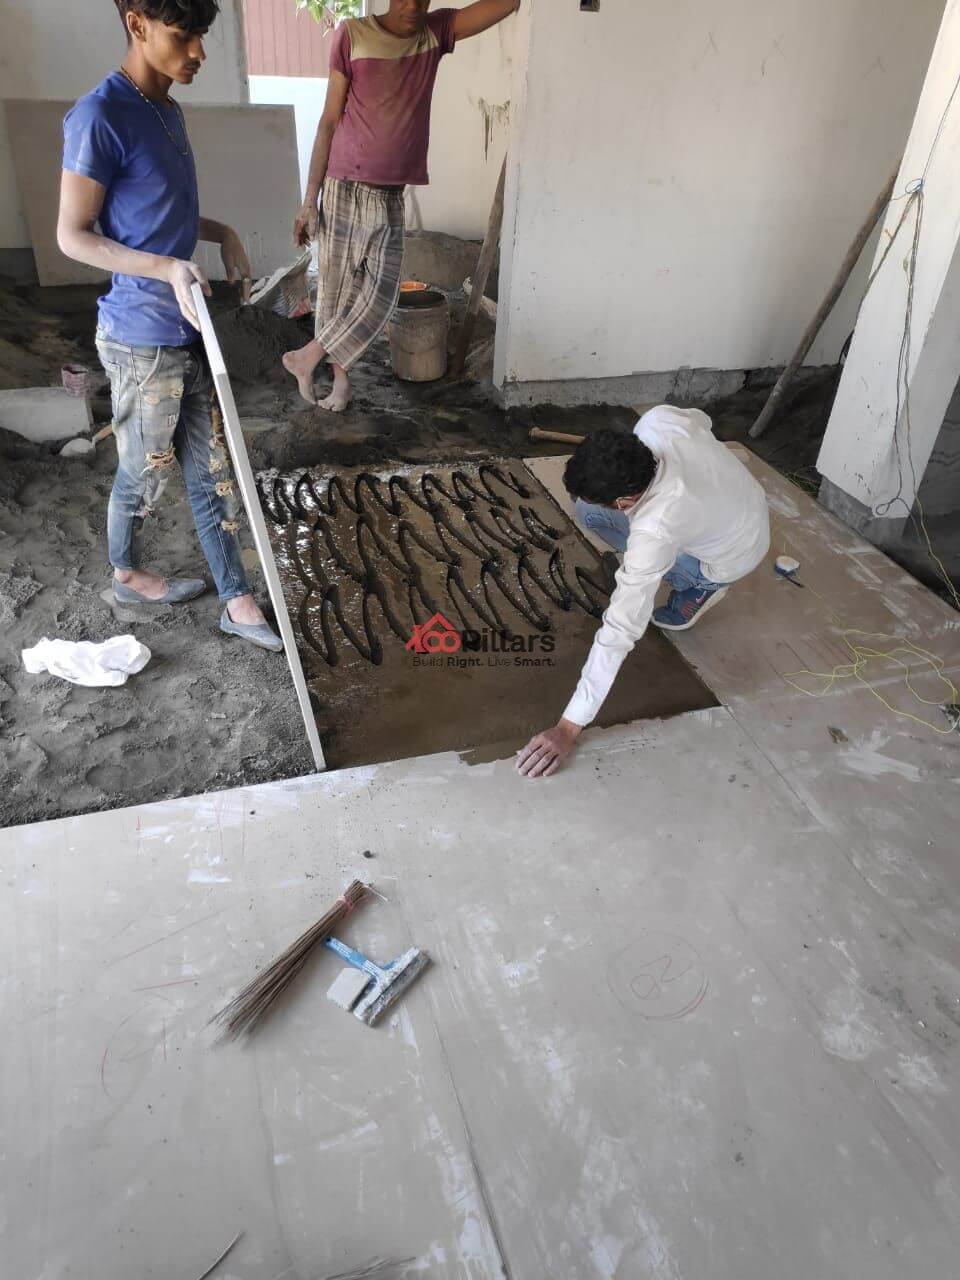
(xii) Plinth Reinforcement and Concrete:

A plinth beam is a form of the reinforced concrete beam between the wall and its foundation. It prevents the extension or continuous crack formation from the foundation into the wall above the foundation. The plinth beam helps in distributing the wall load above the foundation. It is obligatory to provide
The Plinth beam should have a minimum depth of 20cm and the width of the final course should match the foundation level.
Duration: (3-4)days
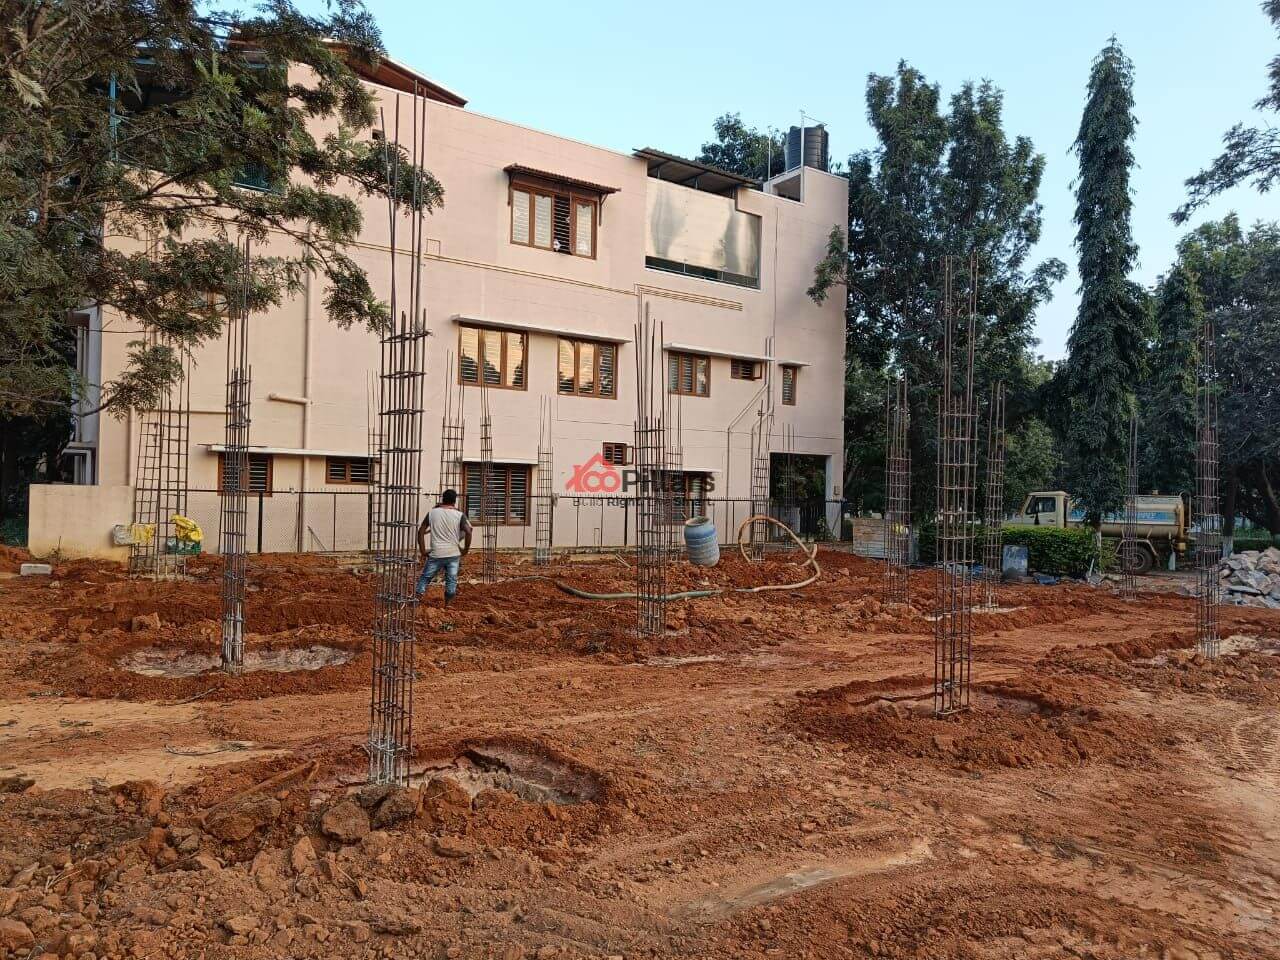
(xiii) Column Raising:

RCC Column is a form of vertical RCC structural member that helps in transferring load from beam and slab directly to the soil underneath it.
Building RCC Columns involves 4 stages:
(a) Column Layout Work: The column locations are practically determined in the field. It is located by laying rope in the form of grids as per the drawing plan. Then the column location is marked coinciding with concurrent rope.
(b) Column Reinforcement Work: After setting the column location, column reinforcement is carried out as per the plan. The general column diameter is 16mm and the stirrup diameter used is 8mm.
(c )Column Formwork: If the beam depth specified in the drawing is 1’-6”, then the casting height of the column will be around 8’-6”. So, we have a formwork prepared for a height of 8’-6”. Dropping concrete from a height of 5’ leads to segregation during pouring. Hence it is required to make one side of column formwork confined within 5 feet range. Post casting the 5 feet column, you can raise the short side of the column the next day.
(d) Pouring Concrete into the column: You can opt for RMC trucks for large quantities and machine mix for a smaller range. Care must be taken that the concrete must be laid within a height of 5 feet range in the case of RMC trucks to avoid segregation.
Duration: 1 day
(xiv) Blockwork:

It is a form of construction in which large cement or concrete blocks are laid in the courses to form a wall structure. Blockworks are preferred over brickworks owing to their hollow center making them easier and lighter to work with.
The standard face side dimensions of the cement block measure 450×225 m, thickness ranges from 60mm to 150mm and the block weigh around 6.3kg to 15kg
Duration: 10days
(xv) Lintel level Block and Lintel Beams:

A lintel is a horizontal beam that provides support to the above walls which have openings in the form of windows, doors, etc. The main purpose of the lintel is to sustain loads coming from the above wall of the superstructure and carefully shift its loads to the sidewalls.
The minimum width for lintel should be maintained at 4inches (100mm). The lintel width can be kept equal to the opening thickness and depth ranging from 1/12 to ⅛ of the span.
Duration: 5days
(xvi)Blockwork till Roof:
Following the same procedure as the previous blockwork till lintel level
Duration: 3 days
(xvii) Shuttering for Slab
Shuttering is a form of temporary formwork adopted to impart support for fresh concrete. Shuttering may be done using different materials such as steel, RCC, plain concrete form,
Duration: 3 days
(xviii) Barbending for Slab:

Bar Bending schedule is mainly done to estimate the exact size, shape, quantity of reinforcement required during the construction process. The information for the bar bending schedule is obtained from reinforcement detailing drawings.
Duration: 2 days
(xix) Electric Wiring:

A construction site requires high power demands. Fixed Wiring is crucial and necessary to carry out all activities at the site. This is done by installing all power cables, distribution boards and sockets to carry out the site activities with ease.
Duration: 1 day
(xx) Slab Casting Concrete:

It mainly involves providing construction joints, concrete production using RMC or machines at the site, pouring of concrete, finishing the concrete slab surface and then carrying out the curing.
Duration: 1 day
(xxi) Internal Plastering:
It is done to plaster internal walls for providing a finished surface that is smooth and firm. The plastered layer acts as a thermal insulating layer to some degree. This layer also protects against fire.
(xxii) Electric Grove Cutting and Plumbing (Connection Lines Work):
All plumbing and electrical wiring connections are laid out post plastering the internal surfaces.
(xxiii)Paint Putty Work:

The main purpose of putty work is to fill the voids, cracks, pores that are developed on the plastered surface. This helps in ensuring a smooth flat surface for the painting work.
(xxiv)Flooring Work:
There are diverse types of flooring material options available depending on the aesthetics, choice of user and application. The flooring material should be chosen based on its durability to withstand any type of wear and tear that occurs in the future.
(xxv) External Plastering:

External Plastering is finished with suitable materials to protect against rain penetration, protection against changes in atmospheric changes(sudden weather changes), aesthetics and most importantly to increase the durability of the building.
(xxvi) Painting Work:
Painting a building surface protects its interiors and exteriors from wind, stains, molds, UV rays, water penetration,and other harsh climatic conditions.
(xxvii) Electric Wiring and Earth Work:
Electric Wiring with Earthing is mainly done for the safety of human beings from any kind of mishaps or voltage fluctuations.
(xxviii) Plumbing and Sanitary fixtures:
Plumbing comprises all pipe fittings and accessories used for drainage and water supply. Sanitary work includes transferring the wastewater to the disposal system with the help of Plumbing fixtures.
(xxix) Cleaning and External building work:
The entire site is cleaned from any kind of debris and waste generated during the construction phase. If there are any final touches to be done, it is completed at this stage.
5) Closeout Phase (Also known as ‘Post Construction Phase’)
The period spanning from the finish of physical construction activities up to handing over the project to the owner is termed as ‘ Post Construction Phase’.
Firstly, an inspection is carried out for the whole building to make sure all plans are delivered accordingly.
Post the successful evaluation of inspection, the project team educates the client on operating and maintenance of the building. These guidelines and tips aid in increasing the lifespan of the structure.
After which, a final post-project review can be carried out to assess any uncovered tasks to avoid future complications.
Final Thoughts
Each stage of the construction project consists of a series of events, tools and decisions. Its complexity relies mainly upon the size and type of the project. But all the core steps and processes for any project remain the same.
Extraordinary communication between various stakeholders and decisions based on logic are the main pillars for the successful streamlining of a project. This ensures all phases of the project are planned and executed within the allocated budget and timeframe.